How to use a custom image on your VPS
This guide explains how to write a custom image directly to your VPS disk from Resque mode. After a reboot, your VPS starts the system from the image right away.
Warning
Writing an image completely overwrites the VPS disk. All data on the server, including the current operating system, will be permanently lost. Make a backup of anything you need before you start.
Image formats
Ready-made images usually come in .img, .raw or .qcow2 format, often packed into a .zip or .gz archive. .img and .raw images can be written as they are, while .qcow2 images must be converted to .raw first (for example, with qemu-img convert -O raw image.qcow2 image.raw), which is not possible in the Resque system.
-
Log in to panel: https://vps-panel.veesp.com:443 by using your Username and Password from the VPS Service page "Login Details" tab.
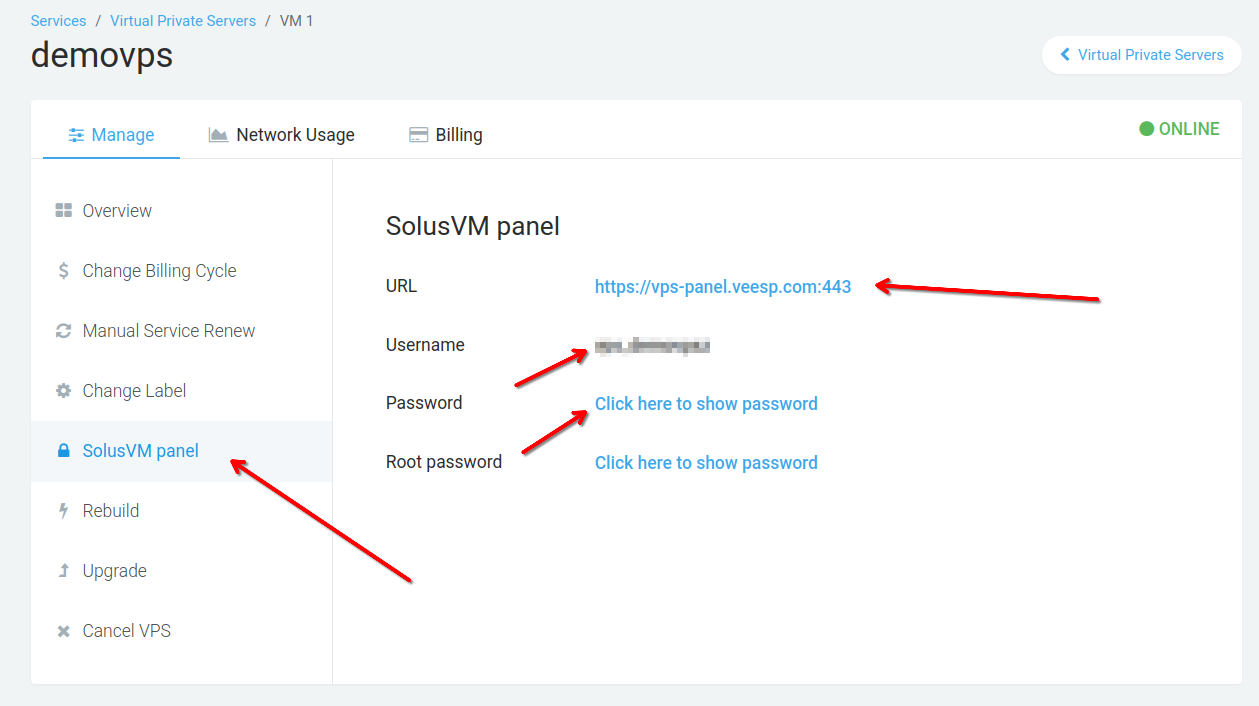
-
Enter the "Resque" mode
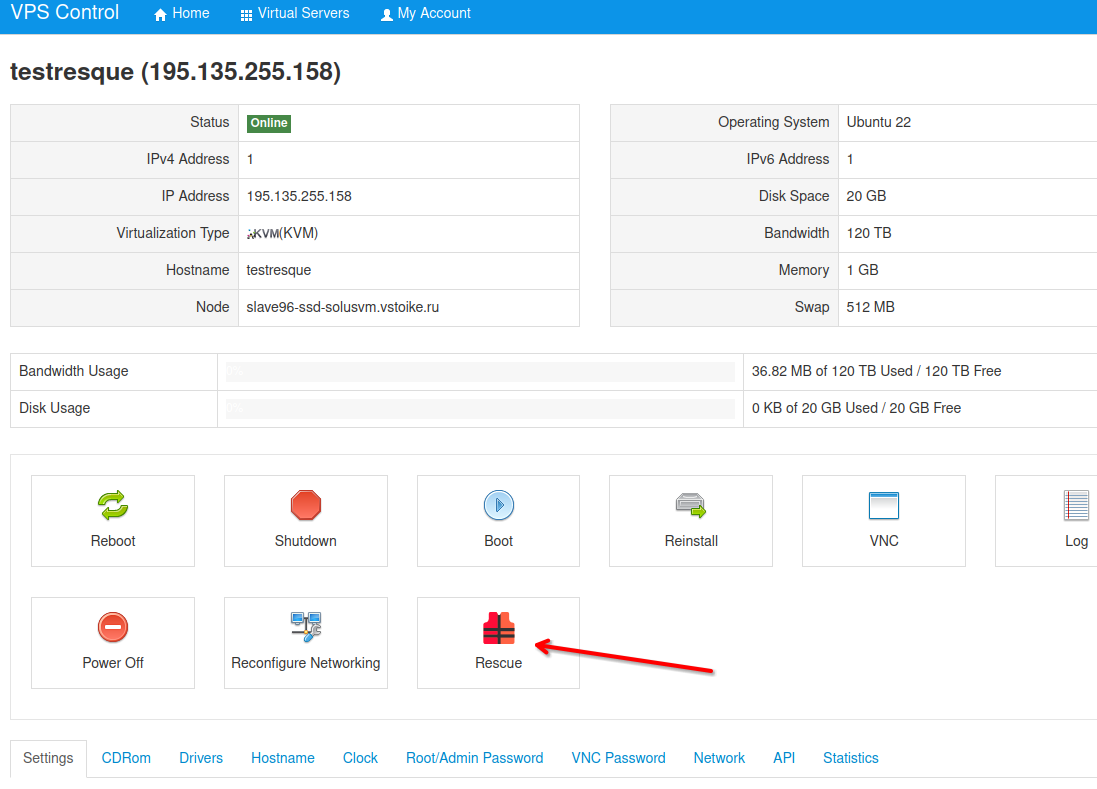
-
Click "Enable Resque Mode" and press "Yes" to confirm
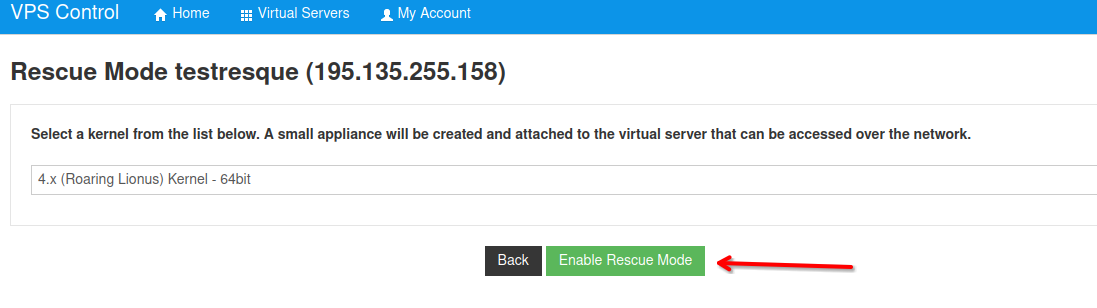
When Enabled - Rescue mode can take several minutes before it becomes accessible on the network
-
SSH into your VM from terminal using "Resque SSH connection details"
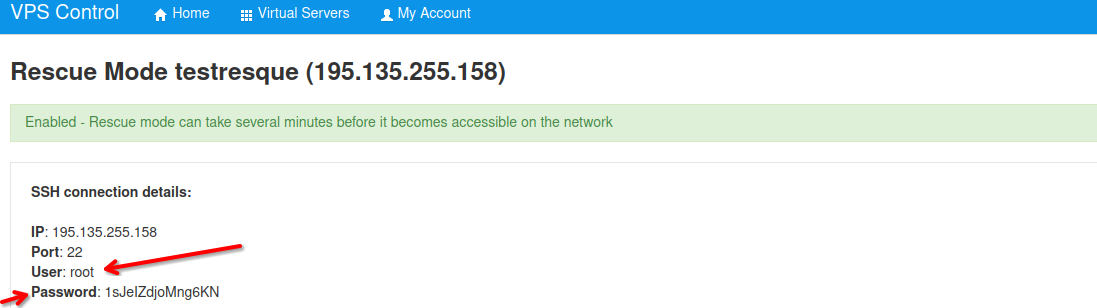
-
Find your VPS disk with the
lsblkcommand:Example output:
NAME   MAJ:MIN RM  SIZE RO TYPE MOUNTPOINT
sda      8:0    0   40G  0 disk
├─sda1   8:1    0    1M  0 part
└─sda2   8:2    0   40G  0 part
sr0     11:0    1 1024M  0 rom
vda    254:0    0  1.1G  0 disk
└─vda1 254:1    0  1.1G  0 part /
Your VPS disk is the one whose size matches your VPS hosting plan, in this example sda (40G). Use the whole disk (
/dev/sda), not a partition such as/dev/sda2.Warning
The small disk mounted as
/(here vda, 1.1G) is the Resque system itself. Never write the image to it. -
Download the image and write it to the disk. The Resque system has no
curlorwget, so usepython3. Choose the tab that matches your image format, put a direct link to the image in theURLline and replace/dev/sdawith your disk from step 5:URL="http://downloads.openwrt.org/releases/25.12.5/targets/x86/64/openwrt-25.12.5-x86-64-generic-ext4-combined.img.gz" python3 -c "import urllib.request,zlib,sys; r=urllib.request.urlopen(sys.argv[1]); d=zlib.decompressobj(31); [sys.stdout.buffer.write(d.decompress(c)) for c in iter(lambda: r.read(1048576), b'')]" "$URL" | dd of=/dev/sda bs=4M status=progress conv=fsyncA
.ziparchive has to be downloaded first. Check that there is enough free space withdf -h /, then download the archive and write the image from it:URL="http://download.mikrotik.com/routeros/7.24.6/chr-7.24.6.img.zip" python3 -c "import urllib.request,shutil,sys; shutil.copyfileobj(urllib.request.urlopen(sys.argv[1]), open('/root/image.zip','wb'))" "$URL" python3 -c "import zipfile,shutil,sys; z=zipfile.ZipFile('/root/image.zip'); shutil.copyfileobj(z.open(z.namelist()[0]), sys.stdout.buffer)" | dd of=/dev/sda bs=4M status=progress conv=fsyncNote
The Resque system can download only via
http://links:https://links fail with theCERTIFICATE_VERIFY_FAILEDerror. If you get0 bytes copied, the download failed and nothing was written to the disk.Note
Double-check the
of=value before you press Enter.dddoes not ask for confirmation. -
Flush all data to the disk and check the result:
The partitions from the image should now be listed under your disk instead of the old ones.
-
Click "Disable Resque Mode" and it will reboot the server.
-
Open the VNC console. The VPS will boot the system from the image. Log in with the default credentials of the image.